
MANUAL
STEP Nano ST2046
Edition 1
Content
4.1 Lock and open button
4.2 OSDP
1 Introduction
This article provides instructions for setting up, installing, using and maintaining the ST2046 Nano door controller.
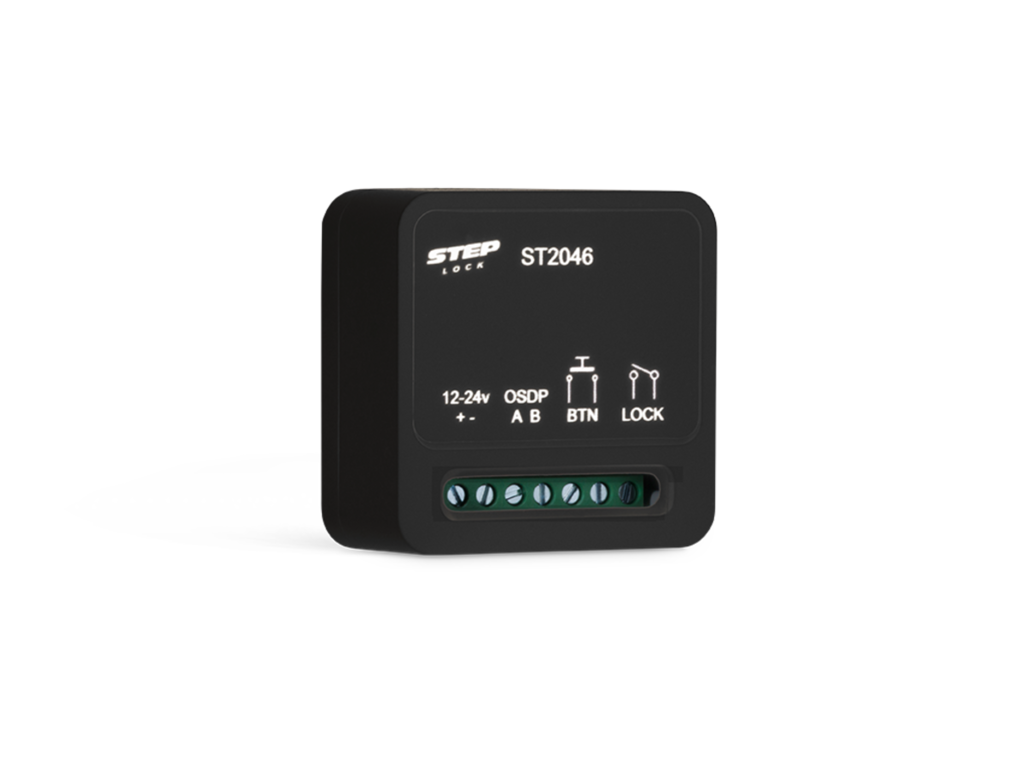
ST2046 Nano is a compact door central designed for controlling a door with support for BLE, OSDP and relay-controlled lock. It can be used both in stand-alone installations via Steplock Lite and in larger system solutions in hybrid mode* via Steplock Cloud / PRO.
* Not yet included, future function.
1.1 Tekniska specification
| Specifikations | ST2046 |
| Power | 12–24 VDC ±15% |
| Power consumption | 9 mA norm, 25 mA max |
| IP Rating | IP21 |
| Color | Black |
| Communication | BLE, OSDP |
| Dimensions (HxWxD) | 40×40x20 mm |
| Input | Open button |
| Output | Potential free relay, Max 1A |
2 Overview
Following is an overview of the ST2046 Nano door controller. Measurements in mm.
2.1 STEP Nano
2.2 Connections
| Power | OSDP | |||
| Plint | Beskrivning | Plint | Beskrivning | |
| (1) + | Power input 12-24V AC/DC | (3) A | OSDP Communication interface A | |
| (2) - | Power ground | (4) B | OSDP Communication interface B | |
| Open button | Lock | |||
| Plint | Beskrivning | Plint | Beskrivning | |
| (5) C | Button Common | (7) C | Lock - Common | |
| (6) NO | Button Normaly Open | (8) NO | Lock - Normaly Open | |
3 Included in the package
|
1 x ST2046 |
1 x QR-code for Setup in StepLock Lite |
4 Installation
4.1 Lock and open button
1. Makes sure the power is off when connecting the cables to the 12-24V input on the Nano.
2. Connect the lock to the lock relay function with power from the power source, the maximum recommended current through the relay is 1A.
3. Connect the open button to the BTN input on the Nano.
4. Turn on the power.
5. Mount the Nano in the door frame, behind a normal recceced open button or a standard connection box.
6. Test function by following the instructions on how to set up the Nano in the StepLock Lite App.
4.2 OSDP
Connect OSDP before starting up the device.
Go to manage devices, select the device and search for OSDP.
The card reader must have adress 0.
5 App administration
Step by Step guide on how to setup a system, add a device and give permission to end users.
You can have 100 users and 50 devices per system
The account that is logged in when the system is created will automatically become the system owner and cannot delete the system or remove its own admin rights. If the system owner needs to be changed, please contact our support team and we will assist with this.
We recommend creating the system using the end user’s account.
- Press the "settings wheel" at the top right corner.
- Press "Create system"
See images below
3. Enter a System name and press the "Scan QR Code" Button.
4. Aim the Camera towards the QR-code of the device you want to add.
See images below
The system has now been created and we added the device to the system called "STBLE_766E".
This door can now be opened by pressing the Lock symbol (Button) as long as you are nearby the device.
OBS - You might get a popup saying enable bluetooth. This needs to be allowed in order for the Phone and the device to communicate so the door can be opened.
5. Press the button "Go to my system"
The "Doors" Meny is the one displayed in the image below
Admin Menu
This menu is for the administrator of the system to manage the whole system for the users. You can add permission to open using keyfobs, ekeys. Manage devices and see logs.
- Manage my system
In this meny you can change the name of the "System name" and change the "System time zone".
- Manage Devices
In this menu you can see all devices and add new devices or remove devices. You can also click on one device to get to the next menu to see and change the device settings.
-
Manage Ekeys
In this menu you can see all the ekeys, create new ones and manage existing. ekey is access through the app when pressing the lock symbol showed in doors menu.
Once "Add ekey" is pressed you can select if you want to invite someone to help administrate the system or a user which can only open the doors you give the user permission to open.
OBS - You enter the email adress the user used to create the account on Steplock Lite.
- Manage Keyfobs
In this menu you can see all the keyfobs added to the system. You can click add keyfob to add a new keyfob to the system and select which devices it should get access to open.
OBS - When you add a keyfob and select a device. In order for the keyfob to work you need to be close to the device with you app so you can start pushing out the information to the device.
If you are not nearby the device you can postpone the push and it will receive the data at a later time when you interact with the device. This could be by pressing the Lock symbol by opening the door. The Phone will connect and send out all information queued up and open the door ofcourse.
Once the user has been invited they receive a notification on ring bell at the top left of the start menu.
The user clicks the ring bell and accepts the invitation and gains the access to the doors selected by the administrator.
See images below
- View Logs
In this menu you can see all the logs. When you are nearby the device you can select a device and receive the logs of what has happend to this device.
See images below
6 Hybridmode
Possible integration with Steplock Cloud 3.0 estimated available Q3 2026.
7 Fault finding
- No power → control supply.
- Lock does not open → check relay.
- BLE does not reach → avoid metal obstacles.
8 Safety measures
- Do not install on the outside of the door.
- Use separate relay at high current load.